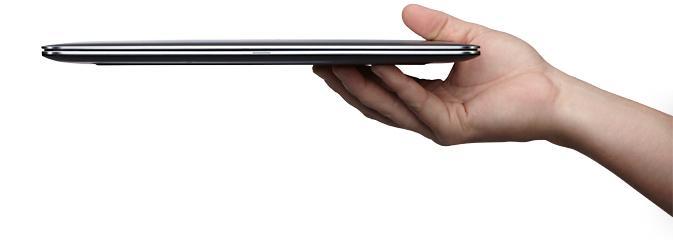
The Dell XPS13 L322X Ultrabook with the third generation i7-3517U @ 1.90GHz dual core Intel processor, DDR3 @ 1600 MHz RAM and 256G SSD disk first started shipping in November 2012. Preorders of the new model could be placed on Amazon.com at a substantial discount, since it was not yet available anywhere. Sadly, it came preloaded with MSFT Windows 8 as the only option. A few weeks later, Dell introduced a "developer" version preloaded with a modified version of Ubuntu 12.04 LTS (Sputnik). The only hardware difference is a slightly faster i7-3537U processor @ 2.0GHz.
The initial release of the hardware was plagued by some serious bugs. Most notably, the A03 BIOS as installed caused random system freezes while moving the touchpad mouse. This was corrected in the A07 BIOS version (Feb 4 2013). It is recommended that users first check the BIOS version shipped if strange behavior is noticed on this platform and upgrade to the latest available from Dell's support site.
The first system installation of Debian Wheezy/testing on the Dell XPS13 was performed on a 32G USB3 stick (Patriot Supersonic XT), using the Debian weekly build iso DVD image loaded on a second USB3 drive (8G used, may work with a 4G USB stick). Download DVD1 from http://cdimage.debian.org/cdimage/weekly-builds/amd64/iso-dvd/
Plug the USB drive that will contain the install media into another Linux machine and issue the following command:
# dd if=debian-testing-amd64-DVD-1.iso of=/dev/sdx
where /dev/sdx is the raw partition of the USB drive. A bootable USB drive is produced, that can start the installer. The regular Dell XPS13 Ultrabook preloaded with Windows 8 comes with UEFI booting enabled to load Windows. This setting needs to be changed in setup.
* Press F2 at boot time for the Phoenix SecureCore Tiano Setup screen
* In the Security tab, disable TPM Security
* In the Boot tab, change the Boot List Option to Legacy Boot,
Secure Boot Disabled, Load Legacy Option Rom Enabled
* Save configuration and exit
When rebooting the system in BIOS mode, the hard drive will report that no operating system was found - that's OK. Windows 8 booting and the Dell diagnostics are set up on the first EFI system partition, and Windows will only start in UEFI boot mode. Insert the USB iso image and a blank USB drive in the slots on both sides. Restart and press the F12 key for Boot Options. Select USB Storage Device from the menu:
-------------------------------------------------------------------

Boot mode is set to:Legacy: Secure boot:OFF

LEGACY BOOT:
     Removable drive
   + Hard Drive
   + USB Storage Device
     CD/DVD/CD-RW Drive
     Network
UEFI BOOT:
     Windows Boot Manager
     Network Boot
OTHER OPTIONS:
     Setup
     Diagnostics
     Change boot mode setting

-------------------------------------------------------------------
Boot in the USB Storage Device and select Advanced options, Expert
install. Proceed with the installer. Detect and mount CD-ROM will
detect the USB image as the CD Debian GNU/Linux testing "Wheezy" -
Official Snapshot amd64 DVD Binary-1. Continue with the installation
and load all components. Detect disks and partition in Manual mode.
Do not use SCSI1 (0,0,0) (sda). Partition and install only on the
blank USB drive, which as far as the installer is concerned, is just
another scsi hard drive.
For this install, a full system with a separate /boot ext2 partition and LVM on another partition was created on the USB drive, just as it will be installed later on the XPS13 hard drive. The simpler lilo boot loader was selected over grub to allow more flexibility in adding another Linux version in the future (CentOS still uses grub, and Debian has grub2, which requires chainloading for legacy grub), and because elilo may work in the future to boot in UEFI mode. There was some serious tinkering needed to make lilo work from the installer, requiring a shell escape and manual setup to create a lilo.conf file with the proper drive specified as boot (boot=/dev/sdx) and root (root=/dev/mapper/vgx-root), and executing the /sbin/lilo command on the chroot target. For some yet unknown reson, the installer reports the lilo boot loader step as failing in this configuration (could be because root was set up on an LVM?), but it boots after manual intervention.
If booting the first time fails or you damage lilo, you may be able to repeat the install process without actually reinstalling the system - only identify disks, execute a shell, create /target and mount your partitions, then edit your config files and execute lilo.
Booting the new system from the USB drive is simple: press F12 and select USB Storage Device from the menu. You may want to start the boot process with a simple text menu (install=text) in /boot/bootmess.txt to allow other choices, like:
-------------------------------------------------------------------
LILO 23.2
                ***********************************************
                ***                  XPS13                  ***
                ***             LILO Start Menu             ***
                ***********************************************

                    1 - Debian
                    2 - Debian_OLD
                    3 - CentOS
                    4 - CentOS_OLD
                    5 - FreeDOS

                    Enter a menu item number from the list
                    or wait 15 seconds for the default (1).

boot:
Loading Debian.....................

-------------------------------------------------------------------
Or you could use a splash bitmap image to add graphics to the lilo
boot process (install=bmp). The following parametes are for the
coffee cup theme included in the Debian
lilo distribution:
# Bitmap configuration for coffee.bmp
bitmap=/boot/coffee.bmp
bmp-colors=12,,11,15,,8
bmp-table=385p,100p,1,10
bmp-timer=38,2,13,1
After installing the basic system, you will need to load the non-free wifi driver iwlwifi-6000g2b-6.ucode in /lib/firmware to enable the wireless network. This will facilitate setting up the wlan0 interface so that you can load the rest of the system and applications software over the net (remember, there are three DVDs, and we only used the first image on the USB).
Since the Dell XPS13 does not have a hardwired ethernet port, a USB dongle can be connected to the other USB port. The StarTech.com USB 3.0 to Gigabit Ethernet NIC 10/100/1000 Network Adapter, USB to RJ45 from Amazon.com is an excellent choice. It requires the Asix ax88179_178a.ko driver installed and loaded from the system directory /lib/modules/3.2.0-4-amd64/drivers/net/usb/ but you need to compile the kernel module for it. The source distribution for Linux is available from http://www.asix.com.tw/ and you need to install the Linux kernel sources in order to build the module. The manufacturer provides instructions in the readme file on how to do it.
This XPS13 was configured with a static IP address on the wired Gig-E eth0 interface. As it is a removable device, plugging in the USB dongle after booting activates the network:
[ 5858.269237] usb 4-2: new SuperSpeed USB device number 4 using xhci_hcd
[ 5858.292326] usb 4-2: New USB device found, idVendor=0b95, idProduct=1790
[ 5858.292338] usb 4-2: New USB device strings: Mfr=1, Product=2, SerialNumber=3
[ 5858.292345] usb 4-2: Product: AX88179
[ 5858.292350] usb 4-2: Manufacturer: ASIX Elec. Corp.
[ 5858.292354] usb 4-2: SerialNumber: 00000000000000
[ 5858.604584] MAC [00-00-00-00-00-00]
[ 5858.606676] Monitor mode = 0x64
[ 5858.616544] ASIX USB Ethernet Adapter:v1.2.0 16:40:37 Dec  3 2012
[ 5858.616550]     		http://www.asix.com.tw
[ 5858.616559] mtu 1500
[ 5858.617863] ax88179_178a 4-2:1.0: eth0: register 'ax88179_178a' at usb-0000:00:14.0-2, ASIX AX88179 USB 3.0 Gigibit Ethernet, 00:00:00:00:00:00
[ 5858.998356] ADDRCONF(NETDEV_UP): eth0: link is not ready
[ 5862.145824] ax88179_178a 4-2:1.0: eth0: ax8817X - Link status is: 1
[ 5862.148715] USB3.0 Speed 1000
[ 5862.149102] Full duplex
[ 5862.149112] Write medium type: 0x013f
[ 5862.151533] ADDRCONF(NETDEV_CHANGE): eth0: link becomes ready
[ 5862.152898] ax88179_178a 4-2:1.0: eth0: link up, 1000Mbps, full-duplex, lpa 0xCDE1
Screen brightness cannot be adjusted from the keyboard on the XPS13 running Linux. You can fix that with a simple shell script:
#!/bin/sh
echo 0 > /sys/class/backlight/intel_backlight/brightness
The Cypress trackpad Dell used in the XPS13 comes up as ImPS/2 Generic Wheel Mouse in Debian. It functions like mice used to in the old times, that is by clicking the left or right tabs as mouse buttons, and moving the cursor with your finger on the pad. There is much ado on the net about missing functionality like two finger, three finger, four finger gestures, tapping, scrolling, etc. Dell fixed this in Sputnik by incorporating the cypress_ps2 driver and corresponding headers, contributed by Cypress Semiconductor Corporation and modified by Kamal Mostafa, into the psmouse driver code. While it is possible to adapt the patches and compile for the Debian kernel from the Ubuntu open source, it doesn't seem important enough to a Unix sysadmin who rarely uses the GUI for other than opening lots of terminal windows on Unix/Linux systems.
After installing and testing everything to satisfaction on the USB drive, it was time to set up a permanent Debian image on the Dell XPS13 hard drive SCSI1 (0,0,0) (sda). While it is possible to shrink the 222G ntfs partition #5 labeled "Microsoft basic data" and make room for Debian without disturbing the factory setup and recovery for Windows 8, in this instance there was no need to keep it, as this XPS13 Ultrabook was slated to become a pure Linux machine. The 500M EFI system partition #1 and the 40M Dell fat32 partition #2 were left in place to preserve diagnostics and allow setting up Linux in UEFI boot mode sometime in the future. This is how the Dell factory setup for Windows looks like:
# parted -l
Model: ATA LITEONIT LMT-256 (scsi)
Disk /dev/sda: 256GB
Sector size (logical/physical): 512B/512B
Partitioe Table: gpt

Number  Start   End     Size    File system  Name                          Flags
 1      1049kB  525MB   524MB   fat32        EFI system partition          boot
 2      525MB   567MB   41.9MB  fat32        Basic data partition
 3      567MB   701MB   134MB                Microsoft reserved partition  msftres
 4      701MB   1226MB  524MB   ntfs         Basic data partition          diag
 5      1226MB  240GB   238GB   ntfs         Basic data partition
 7      240GB   247GB   7897MB  ntfs         Microsoft recovery partition  diag
 6      247GB   256GB   8596MB               Basic data partition
Here is another view:
# cgdisk /dev/sda
                                  cgdisk 0.8.5

                              Disk Drive: /dev/sda
                           Size: 500118192, 238.5 GiB

Part. #     Size        Partition Type            Partition Name
----------------------------------------------------------------
            1007.0 KiB  free space
   1        500.0 MiB   EFI System                EFI system partition
   2        40.0 MiB    Unknown                   Basic data partition
   3        128.0 MiB   Microsoft reserved        Microsoft reserved partition
   4        500.0 MiB   Windows RE                Basic data partition
   5        222.0 GiB   Microsoft basic data      Basic data partition
   7        7.4 GiB     Windows RE                Microsoft recovery partition
   6        8.0 GiB     Unknown                   Basic data partition
            327.5 KiB   free space
From another source, we find out that this is how Dell actually set
up Ubuntu Sputnik on the XPS13 "developer edition":
$ sudo parted -l
Model: ATA SAMSUNG SSD PM83 (scsi)
Disk /dev/sda: 256GB
Sector size (logical/physical): 512B/512B
Partition Table: msdos

Number  Start   End     Size    Type      File system     Flags
 1      1049kB  316MB   315MB   primary   fat32           diag
 2      316MB   2885MB  2569MB  primary   fat32           lba
 3      2885MB  240GB   237GB   primary   ext4            boot
 4      240GB   256GB   16.3GB  extended
 5      240GB   256GB   16.3GB  logical   linux-swap(v1)
Notice that the partition table in the Ubuntu version is MSDOS, not GPT like we have on the Windows box, so they are booting from BIOS Legacy Boot - no UEFI, no headaches.
To prepare the hard drive, repartitioning was performed with gdisk (GPT fdisk) from the system booted from USB:
# gdisk /dev/sda
GPT fdisk (gdisk) version 0.8.5

Partition table scan:
  MBR: protective
  BSD: not present
  APM: not present
  GPT: present

Found valid GPT with protective MBR; using GPT.

Command (? for help): p
Disk /dev/sda: 500118192 sectors, 238.5 GiB
Logical sector size: 512 bytes
Disk identifier (GUID): 50BAB56F-E04D-48ED-8921-CB4FDB876942
Partition table holds up to 128 entries
First usable sector is 34, last usable sector is 500118158
Partitions will be aligned on 2048-sector boundaries
Total free space is 2669 sectors (1.3 MiB)

Number  Start (sector)    End (sector)  Size       Code  Name
   1            2048         1026047   500.0 MiB   EF00  EFI system partition
   2         1026048         1107967   40.0 MiB    FFFF  Basic data partition
   3         1107968         1370111   128.0 MiB   0C01  Microsoft reserved part
   4         1370112         2394111   500.0 MiB   2700  Basic data partition
   5         2394112       467904511   222.0 GiB   0700  Basic data partition
   6       483328000       500117503   8.0 GiB     FFFF  Basic data partition
   7       467904512       483327999   7.4 GiB     2700  Microsoft recovery part
Delete partitions 3,4,5,6,7 and repartition the free space to suit your needs. Do not touch 1 and 2 - the first partition is an EFI fat32 system partition required for UEFI boot for the installed OS and also contains Dell diagnostics. The second 40M fat32 partition is empty, but it appears Dell set it up as workspace (maybe to store event logs for HW diagnostics?).
Last partition you create should end at an offset (2048 sectors seems adequate - leaves a safe 1M as free space at the end of the disk for the GPT backup partition table).
Command (? for help): n
Partition number (7-128, default 7):
First sector (34-500118158, default = 466464768) or {+-}size{KMGTP}:
Last sector (466464768-500118158, default = 500118158) or {+-}size{KMGTP}: -2048
Current type is 'Linux filesystem'
Hex code or GUID (L to show codes, Enter = 8300): 8200
Changed type of partition to 'Linux swap'
GPT fdisk recognizes the following partition types:
Command (? for help): L
0700 Microsoft basic data  0c01 Microsoft reserved    2700 Windows RE
4200 Windows LDM data      4201 Windows LDM metadata  7501 IBM GPFS
7f00 ChromeOS kernel       7f01 ChromeOS root         7f02 ChromeOS reserved
8200 Linux swap            8300 Linux filesystem      8301 Linux reserved
8e00 Linux LVM             a500 FreeBSD disklabel     a501 FreeBSD boot
a502 FreeBSD swap          a503 FreeBSD UFS           a504 FreeBSD ZFS
a505 FreeBSD Vinum/RAID    a580 Midnight BSD data     a581 Midnight BSD boot
a582 Midnight BSD swap     a583 Midnight BSD UFS      a584 Midnight BSD ZFS
a585 Midnight BSD Vinum    a800 Apple UFS             a901 NetBSD swap
a902 NetBSD FFS            a903 NetBSD LFS            a904 NetBSD concatenated
a905 NetBSD encrypted      a906 NetBSD RAID           ab00 Apple boot
af00 Apple HFS/HFS+        af01 Apple RAID            af02 Apple RAID offline
af03 Apple label           af04 AppleTV recovery      af05 Apple Core Storage
be00 Solaris boot          bf00 Solaris root          bf01 Solaris /usr & Mac Z
bf02 Solaris swap          bf03 Solaris backup        bf04 Solaris /var
bf05 Solaris /home         bf06 Solaris alternate se  bf07 Solaris Reserved 1
bf08 Solaris Reserved 2    bf09 Solaris Reserved 3    bf0a Solaris Reserved 4
bf0b Solaris Reserved 5    c001 HP-UX data            c002 HP-UX service
ef00 EFI System            ef01 MBR partition scheme  ef02 BIOS boot partition
fd00 Linux RAID
Do not change partition types for 1 and 2 (Dell set it up that way - there is no known type ffff, but gdisk will save the partition table and leave the type ffff in place for 2 if you don't monkey with it). After deleting old and adding new partitions on the hard drive, the following scheme was used in this project:
Command (? for help): p
Disk /dev/sda: 500118192 sectors, 238.5 GiB
Logical sector size: 512 bytes
Disk identifier (GUID): 50BAB56F-E04D-48ED-8921-CB4FDB876942
Partition table holds up to 128 entries
First usable sector is 34, last usable sector is 500118158
Partitions will be aligned on 2048-sector boundaries
Total free space is 4062 sectors (2.0 MiB)

Number  Start (sector)    End (sector)  Size       Code  Name
   1            2048         1026047   500.0 MiB   EF00  EFI system partition
   2         1026048         1107967   40.0 MiB    FFFF  Basic data partition
   3         1107968         3205119   1024.0 MiB  EF02  boot
   4         3205120       212920319   100.0 GiB   8E00  Debian
   5       212920320       422635519   100.0 GiB   8E00  CentOS
   6       422635520       466464767   20.9 GiB    8300  data
   7       466464768       500116110   16.0 GiB    8200  Linux swap
In expert mode, set the boot flag on partition 3, which will be formatted as ext2 and used on the /boot mount for both Linux versions (1G shoud be more than able to hold several versions of kernels and initrd image files for two Linux flavors - just be careful with naming the files as not to overwrite whichever was linked to vmlinuz and initrd.img first). In such a mixed setup, it may be wise to check everything _before_ you reboot and keep a backup copy of your files, especially after an upgrade.
Command (? for help): x

Expert command (? for help): a
Partition number (1-7): 3
Known attributes are:
0: system partition
1: hide from EFI
2: legacy BIOS bootable
60: read-only
62: hidden
63: do not automount

Attribute value is 0000000000000000. Set fields are:
  No fields set

Toggle which attribute field (0-63, 64 or <Enter> to exit): 2
Have enabled the 'legacy BIOS bootable' attribute.
Attribute value is 0000000000000004. Set fields are:
2 (legacy BIOS bootable)

Toggle which attribute field (0-63, 64 or <Enter> to exit):

Expert command (? for help): w

Final checks complete. About to write GPT data. THIS WILL OVERWRITE EXISTING
PARTITIONS!!

Do you want to proceed? (Y/N): _
After repartitioning the hard disk, you may now create the physical volumes:
# pvcreate /dev/sda4
  writing physival volume data to disk "/dev/sda4"
  Physical volume "/dev/sda4" successfully created
Optionally, do the same for /dev/sda5, which will contain CentOS in this particular setup. Create the volume groups:
# vgcreate vg1 /dev/sda4
  Volume group "vg1" successfully created
A volume group can also be created on /dev/sda5 for CentOS. It will be of metadata type lvm2, and any partitioning done in Debian Linux is valid in another flavor. It is important not to use the same name for VGs on different drives, as you can see and mount the partitions of another setup on the same host. LV names can be the same on different VGs, as the VG name precedes the LV (i.e. vg0-root on USB /dev/sdb2, vg1-root on HD /dev/sda4, vg2-root on HD /dev/sda5).
Next, create all logical volumes you will use in your setup. For example, to create an LV named root on disk /dev/sda5 of size 3G:
# lvcreate -L 3G -n root vg2 -v
    Setting logging type to disk
    Finding volume group "vg2"
    Archiving volume group "vg2" metadata (seqno 1).
    Creating logical volume root
    Creating volume group backup "/etc/lvm/backup/vg2" (seqno 2).
    Found volume group "vg2"
    activation/volume_list configuration setting not defined: Checking only host tags for vg2/root
    Creating vg2-root
    Loading vg2-root table (254:6)
    Resuming vg2-root (254:6)
    Clearing start of logical volume "root"
    Creating volume group backup "/etc/lvm/backup/vg2" (seqno 2).
  Logical volume "root" created
If you need to extend any LV previously created, use this example
to enlarge the volume vg2-root to 8G:
# lvextend -L 8G /dev/mapper/vg2-root
  Extending logical volume root to 8.00 GiB
  Logical volume root successfully resized
After all LVs were created, scan the VGs (# lvm vgscan -v) and activate the LVs (# lvm vgchange -a y). You can then create filesystems on the boot partition and the LVs to suit your needs (i.e., ext2 for boot partition /dev/sda3, journaled ext4 for root, tmp, usr, var, opt, home), and # mkswap /dev/sda7 for the Linux swap partition. For example, to create an ext4 journaled filesystem labeled root on /dev/mapper/vg2-root with default parameters, use command:
# mkfs -L root -t ext4 /dev/mapper/vg2-root
mke2fs 1.42.5 (29-Jul-2012)
Discarding device blocks: done
Filesystem label=root
OS type: Linux
Block size=4096 (log=2)
Fragment size=4096 (log=2)
Stride=0 blocks, Stripe width=0 blocks
524288 inodes, 2097152 blocks
104857 blocks (5.00%) reserved for the super user
First data block=0
Maximum filesystem blocks=2147483648
64 block groups
32768 blocks per group, 32768 fragments per group
8192 inodes per group
Superblock backups stored on blocks:
	32768, 98304, 163840, 229376, 294912, 819200, 884736, 1605632

Allocating group tables: done
Writing inode tables: done
Creating journal (32768 blocks): done
Writing superblocks and filesystem accounting information: done
Create a mount point in your root filesystem (# mkdir /a; chmod 755 /a). Mount the root LV you created (# mount -t ext4 /dev/mapper/vg1-root /a). Create a directory tree under /a where you can mount the rest of the LVs for the new HD setup:
# mkdir /a/boot; chmod 755 /a/boot
# mount -t ext2 /dev/sda3 /a/boot
# mkdir /a/usr; chmod 755 /a/usr
# mount -t ext4 /dev/mapper/vg1-usr /a/usr
#
...etc
Check permissions and ownership for your new filesystems to match what you have on the system. Copy all files on your system from the USB to the new partitions mounted under /a (use cpio -pmvdu or rsync). Do not copy the contents of /run, /sys, /proc, /dev - only the directory mount point should exist.
Edit the /a/etc/fstab and modify the devices and volume names for the new system on the HD. Edit /a/etc/lilo.conf and change the drive specified as boot (boot=/dev/sda) and root (root=/dev/mapper/vg1-root). chroot to /a and execute the /sbin/lilo command with the new lilo.conf
Be extremely careful before you execute lilo and understand beforehand where and what exactly it will write. You don't want to damage the USB bootloader, or the wrong partition on the HD. Check everything before you halt the system.
Halt and unplug the USB stick. If everything was done correctly, Debian should now boot from the hard drive in BIOS Legacy mode. Your system will be a copy of what you have on the USB drive.
This rather tedious method was used to set up unsupported Linux on a brand-new Dell HW product, of capabilities and quirks unknown, just after Windows 8 came out and mandatory UEFI booting radically altered the traditional PC BIOS setup. Testing Debian by first loading the OS on a USB stick was the prudent approach at the time, as Dell will not support anything other than Windows 8 and Ubuntu Sputnik on the XPS13. The problem with Sputnik is that the Ubuntu 12.04 LTS release it's based on is already a version behind the current Ubuntu release. Will Dell keep pace with Ubuntu in upgrades? Debian issues weekly updates (usually released on Monday) of the latest and greatest stuff, which may not be available on Sputnik.
Now that it was proven Debian works on this platform, you may be able to simply plug in a USB drive containing a Debian image and just follow the conventional OS install procedures directly onto the hard disk. The bleeding edge Debian wheezy/testing installer supports GPT partitioning, and has recently added UEFI-mode booting to the weekly build DVD images (this was not yet available in mid-November 2012 when the initial setup was performed). Whichever method you use to install Linux, you may want to preserve the first two partitions on the hard disk, as they are used in the Dell diagnostics, the XPS13 has no CD drive, and Dell doesn't provide an iso diagnostics image to burn on a USB or install elsewhere for the XPS13. This box comes with no media.
To preview UEFI boot, if you feel brave, you could mount /dev/sda1 as a fat32 filesystem onto /boot/efi, poke around a bit and selectively remove the Windows 8 EFI boot stuff only:
# mkdir /boot/efi; chmod 755 /boot/efi
# mount -t vfat /dev/sda1 /boot/efi
[10232.955632] FAT-fs (sda1): utf8 is not a recommended IO charset for FAT filesystems, filesystem will be case sensitive!
# rm -r /boot/efi/EFI/Microsoft
# mkdir /boot/efi/EFI/Debian
# cp -p /usr/lib/elilo.efi /boot/efi/EFI/Debian/
Then install the rEFInd boot manager, available from Rod Smith's site http://www.rodsbooks.com/refind/ and also copy the UEFI shell binary as /boot/efi/shellx64.efi (Dell doesn't provide any shell in BIOS setup). eEFInd will install in /boot/efi/EFI/BOOT if the Microsoft directory is gone, backing up the previous Boot directory, which can then safely be deleted (contains the now useless Microsoft bootx64.efi file).
rEFInd will now boot from the BIOS setup in UEFI mode, from its own bootx64.efi file. The UEFI shell is visible as a menu option and works. Debian also shows up. Unfortunately, elilo needs further configuration to boot, and the current Debian kernel running on this host doesn't support UEFI (# modprobe efivars loads the kernel module, but no vars are found on the system).
# whoami
root
# modprobe efivars
[ 8407.281844] EFI variables Facility v0.08 2004-May-17
# lsmod | grep efivars
efivars                17780  0
# efibootmgr
Fatal: Couldn't open either sysfs or procfs directories for accessing EFI variables.
Try 'modprobe efivars' as root.
More information on UEFI support in the Linux kernel from: https://wiki.archlinux.org/index.php/Unified_Extensible_Firmware_Interface
-----------------------------------------------------------------------
UEFI Support in Linux Kernel
Linux Kernel config options for UEFI

The required Linux Kernel configuration options for UEFI systems are :

CONFIG_EFI=y
CONFIG_EFI_STUB=y
CONFIG_RELOCATABLE=y
CONFIG_FB_EFI=y
CONFIG_FRAMEBUFFER_CONSOLE=y

UEFI Runtime Variables/Services Support - 'efivars' kernel module.
This option is important as this is required to manipulate UEFI Runtime
Variables using tools like efibootmgr.

CONFIG_EFI_VARS=m

* Note: For Linux to access UEFI Runtime Services, the UEFI Firmware
processor architecture and the Linux kernel processor architecture must
match. This is independent of the bootloader used.

* Note: If the UEFI Firmware arch and Linux Kernel arch are different,
then the "noefi" kernel parameter must be used to avoid the kernel panic
and boot successfully. The "noefi" option instructs the kernel not to
access the UEFI Runtime Services.

GUID Partition Table GPT config option - mandatory for UEFI support

CONFIG_EFI_PARTITION=y

* Note: All of the above options are required to boot Linux via UEFI

--------------------------------------------------------------------------
It looks like a new kernel needs to be built from a Debian USB install image booted in UEFI mode.
 UEFI dangers
Tested building from the latest Debian DVD-1 weekly image which now has an EFI system partition, booting in BIOS Legacy mode (the only way to select a device from the Boot Options menu), but the kernel had the same limitation: no EFI variables. Did some research before attempting to load the Debian kernel in UEFI mode - most threads talk about using grub2 as a bootloader and booting Ubuntu. There is much talk about the UEFI brick bug that affects some Samsung laptop models booted from a Linux live-usb in UEFI mode. The bug was reported as fixed on kernel.org in Linux kernel v3.8. However, Matthew Garrett experimented extensively with UEFI and explains that the Samsung laptop bug is not Linux-specific.
According to Jakob Heinemann, the Samsung Phoenix BIOS UEFI implementation has a second bug. While I have no access to the modified UEFI shell he used to test the NVRAM size, I ran the test he performed with the "drivers" command using the current UEFI shell version 2 build downloaded from the edk2 tianocore repository on SourceForge. The screen freezes in the following state and the XPS13 Ultrabook requires a powercycle to come up again:
2.0 Shell> ver
UEFI Interactive Shell v2.0
Copyright 2009-2011 Intel(r) Corporation. All rights reserved. Beta build 1.0
UEFI v2.31 (Phoenix Technologies Ltd., 0x12345678)
2.0 Shell> drivers
            T   D
D           Y C I
R           P F A
V  Version  E G G #D #C DRIVER NAME                         IMAGE NAME
=== ======= = = = == == =================================== ==========
_
As Heinemann explains it: The "drivers"-command shall list all loaded UEFI drivers. Listing the drivers the last column of the drivers table shows the "DevicePath", the path to the drivers file (which commonly resides inside the firmware). To determine the "DevicePath" of a specific driver, UEFI uses a protocol (as for many things it does), in this case the so called "DEVICE_PATH_PROTOCOL". ... "They seem to use some old UEFI 1 type END_ENTIRE_DEVICE_PATH_TYPE (0xFF). The UEFI-Shell v2 runs into an endless loop for not finding the DevicePaths end. Result: Notebook hangs."
So far, I haven't tried anything truly dangerous with UEFI booting, but I rather not be the first one to brick a Dell XPS13.
In February 2013, on Amazon.com, an upgraded top HW model was made available for preorder: the Dell XPS13R2-1150sLV 13.3-inch Ultrabook (silver anodized aluminum). The item has not yet been released. From the manufacturer data sheet, it uses the i7-3537U Intel processor @ 2.0 GHz, and the display is 13.3in FHD 1080p (the former XPS13-2501sLV model has HD 720p). It comes with Windows 8 preloaded, and lists for $1499.99
More than likely, it will be possible to install and run Debian on the new model as well - the HW features look essentially the same. This baby is one of the most powerful Intel 3rd generation compact Ultrabooks you can convert into a Linux machine (I have AAPL stock, not DELL, but fair is fair). Perhaps Apple should draw some clues from Dell, by upgrading their MacBook Air and introducing a Linux offering as well. Looking at what happened to the AAPL stock price recently, it's about time the fat lady sings...

I haven't had the time to document the installation of CentOS 6.3 on the XPS13 yet. Suffice to say that it works in this dual-boot configuration with Debian and lilo, but some magic was required to set it up (CentOS insists on installing grub and no longer gives another choice). When installing the original CentOS 6.3 from USB media, the video image wraps. This is important: "The text installer has limited capabilities compared to the GUI installer. Most notably there is no support for configuring partition layout, storage methods or package selection." So you will have to do your best installing CentOS with a wrapping screen, and pay attention to what you click on (i.e.,the next button appears on the right side of the screen).
I was also having trouble with the install media not being found. When you get that error, from a console shell prompt, issue the following commands (sdb2 is the USB partition containing the iso images):
# umount /mnt/isodir
# mount -t ext2 /dev/sdb2 /mnt/isodir
The USB CentOS 6.3 install media needs to be configured with two partitions: a vfat partition to boot from, and an ext2 partiton containing the CentOS DVD1 and DVD2 iso images. It's a bug in the CentOS installer, and requires some prep work to set up. The 8G USB 3.0 flash drive was partitioned as follows:
# cfdisk /dev/sdb
                                GNU cfdisk 1.2.5

                                 Patriot Memory
         Disk: /dev/sdb   Disk type: msdos    Size: 7918845951B, 7919MB
              Heads: 244   Sectors per track: 62   Cylinders: 1022

   Number   Flags      Part Type   Filesystem        Label                Size
 ------------------------------------------------------------------------------
      1     Bootable   Primary     fat32                                 1038MB
      2                Primary     ext2                                  6878MB
The video wrap is corrected when upgrading from the 6.3 base release with yum update to a later kernel version. Brightness controls don't work from the keyboard (there is no intel video driver autoconfigued at boot to apply brightness.sh against, only /sys/devices/virtual/backlight/acpi-video0/brightness exists), so you'll stare at a monitor turned up to the brightest setting all day long. The Cypress touchpad acts like a plain PS/2 mouse - no finger gestures, tapping, etc. Let's hope Dell has the common sense to push updates for their newest hardware drivers that the system can autodetect to RedHat, just as they did with Ubuntu.
The good news is that CentOS 6.4 was released in March 2013. The upgrade from 6.3 to 6.4 is painless. Although RedHat has implemented a grub efi driver that gets written as /boot/efi/EFI/redhat/grub.efi, I am still using lilo with this release - it needs coordination on the Debian side, where /etc/lilo.conf is updated and /sbin/lilo is run to update image locations after an upgrade. This is the current kernel version:
# uname -a
Linux xps13 2.6.32-358.0.1.el6.x86_64 #1 SMP Wed Feb 27 06:06:45 UTC 2013 x86_64 x86_64 x86_64 GNU/Linux
# cat /proc/version
Linux version 2.6.32-358.0.1.el6.x86_64 (mockbuild@c6b10.bsys.dev.centos.org) (gcc version 4.4.7 20120313 (Red Hat 4.4.7-3) (GCC) ) #1 SMP Wed Feb 27 06:06:45 UTC 2013
# cat /etc/issue
CentOS release 6.4 (Final)
Kernel \r on an \m
This XPS13 is now running the latest and greatest, state-of-the-art Open Source RHEL version (though sadly, they are still using a 2.6 kernel).
[NEXT] Ultrabook in the cloud - Installing OpenStack on a Dell XPS13 Ultrabook running Debian Wheezy
[NEXT] Ultrabook in the nebula - Installing OpenNebula 4.0 on a Dell XPS13 Ultrabook running Debian sid
 Free Classifieds Advertising - new phpBB3 forum project running on Debian jesse/sid
Cheers,
Mitch Halmu
NetSide Corporation
305-531-1995